Wednesday, October 30, 2019

Are Those Pesky Chromebook Accessibility Tools Really Useful?


Do your students continually turn on those pesky Chromebook accessibility tools like the onscreen keyboard, or the gigantic mouse, or high contrast mode?  Do those tools help anyone? Does any student really use them? You'd be surprised.

Let's take a look at the purpose behind those pesky little tools.

First of all, how do students turn on the tools? And, maybe more importantly, how do you make them turn them off!

When students click on the bottom right, just as they would when they want to sign off or power down the device, there is an option called Accessibility. By clicking on the icon, students will see all the accessibility tools allowed on the Chromebook and can click the titles to turn them on and off. When there is a green check mark next to the tool, it is on. Click the tool again to turn it off. The check mark goes away. Some tools, when turned on, will show an icon in the bottom right corner next to the date/time/battery icons.


So, who should be using these tools? Many of our students don't need them, but some may find them beneficial. Here is what they do, and who might want to use them!

Enhance Visual Clarity
Screen Magnifier Full Screen or Docked
Full Screen - magnifies the screen.
Docked - separates the screen to magnify where the cursor is.
Students with visual impairments, or teachers who want to show students screen directions.
Adjust Mouse Cursor Size
Makes the cursor arrow huge.
Younger students who struggle to click.
High Contrast Mode
Inverts the colors so backgrounds are black and text is white or color.
Students with visual impairments or light sensitivity.
Highlight Cursor and Text
Cursor: adds a red circle around the cursor

Text: adds a blue circle to text fields
Individuals with low vision or those who have trouble navigating the Chromebook.


Voice Input and Output
ChromeVox
A screen reader - reads everything on the screen.
Students with visual impairments.
Select to Speak
A Chromebook Reader - click the speaker icon in the bottom right and highlight text to be read.
Students who need text read aloud.
Mono Audio
Stereo recordings alternate sounds in both speakers or headphones. Mono makes the full audio sound come from both. So users don’t miss part of the audio.
Students with auditory impairments or who may have impairment in one ear.
Dictation
Chromebook Voice Typing - click the microphone button to have what you say typed on the page.
Slow typers, poor spellers, or those students who need help getting thoughts on paper.


Keyboard Input 
On Screen Keyboard

On the surface, this looks like a regular on screen keyboard. But it has some cool features. 1)It actually lets you draw/write using the squiggly line. (one the top bar across the keyboard. 2) It allows for emojis! (bottom left smiley icon) 3) You can dictate from the keyboard. (microphone icon on top bar)
Students who use eye tracking software to navigate a device. 

Students turn this on all the time, and I don’t think they even know about the cool features!
Automatic Clicks
Turn it on to have whatever the mouse is on be clicked. A circle appears around the cursor and when the circle turns from blue to green, the mouse “clicks”
Students with physical impairment and can’t click buttons, or students who struggle to click.
Sticky Keys
When sticky keys are enabled, a key, when  pressed, becomes “sticky”, and will stay selected for several seconds even after the user moves a finger So, if a students needed to click ctrl + C, the control key, they can click ctrl, make it sticky, and move to click the C.
Students with physical impairments or those who have trouble pressing multiple keys at once.

To learn more about these features, take a look at this blog post by John Sowash! https://www.chrmbook.com/chromebook-accessibility/

Monday, October 14, 2019

Lock Students into Google Forms Quiz!


You've been asking for it. Now it's here! The ability to lock students into a Chrome Browser Window when taking a quiz in a Google Form!

If you haven't already been locking quizzes you give to your kiddos.....keep reading!

While in a Google Form, click the settings gear in the upper right hand corner.

Then click the quizzes tab. The first option in the quizzes tab settings is to make the form a quiz. Once you turn on this feature, the next option is to lock the quiz on Chromebooks.


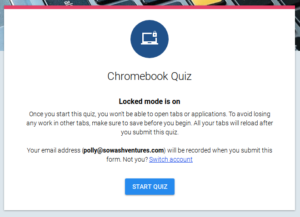
When students open a Google Form Quiz on a Chromebook, they are unable to open or navigate to any other tab on the Chromebook. They will get a warning that "Locked Mode is On." All tabs will reload when the students submit the Form.
Google Forms Locked Quiz mode

During a locked quiz, students will be unable to:

  • Open a new tab
  • Access Chrome apps or extensions
  • Take a screenshot
  • Copy/paste text
  • view page source information

Snap and Read and other Accessibility Tools will still work if a quiz is locked! And the feature is available even when you post the quiz in a Google Classroom class for students! You can even lock a quiz if you make it in a Google Classroom using the same settings options!


Notice, the settings say "Locked Mode on Chromebooks"! This option only works for teachers and students on managed Chromebooks. So if a student brings their own Chromebook and the device is not managed in our Tomball Schools Google Domain, this feature will not work. Nor does it work on tablets or iPads.

So, your cheating worries are over! Well, at least one of them. Give the locked mode in Google Forms a try.